Slide background has a huge impact on the look and feel of your presentation. In this tutorial, you will learn how to change the slide background in SmartTutor 360.
Customizing with Fill Option
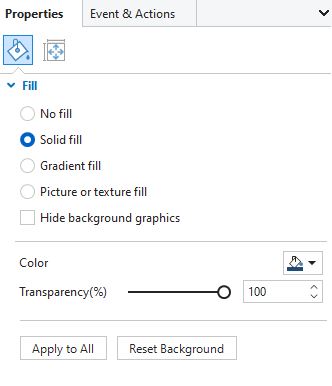
SmartTutor 360 gives you complete control over your background design. By using Fill section, you can fill the background with a solid color, gradient, or picture.

Solid Fill
- Navigate to the Properties pane > Properties tab > Fill section > select Solid fill.
- Click Color and choose the color you want. You can use an available background color in the Theme Colors or Standard Colors section. Besides, click More Colors to create a custom color, or use Eyedropper to select a color you want to match and apply to selected slides.
- (Optional) Drag the Transparency slider to change the opacity level of the background. Alternatively, enter your desired value in the Opacity spin box or click the up/down button to increase/decrease the value.
Gradient Fill
This fills the object with a gradient of two or more colors that blend into one another.
| Type | Choose Linear, Radial |
| Angle | If you’re using a linear gradient, this field lets you specify the angle of the gradient. |
| Gradient Stops | Use a gradient stop for each color in your gradient. You can add and remove gradient stops by clicking Add or Remove.
Set these properties for each gradient stop:
|
Picture or Texture Fill
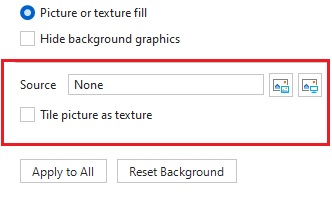
Otherwise, SmartTutor 360 allows you to fill a slide with an image. You can select an image from the current project or import it from your file system.

By default, picture will extend the picture to all edges of the slide by distorting or shrinking it.
After that, select Tile picture as texture to repeat the same picture throughout the background, making multiple tiles of the picture. This is meant for small pictures.
These options are useful as the image’s dimensions don’t match the slide size.
Using Background Styles
Using Background Picture