In today’s digital age, effective instructional design is key to engaging and educating audiences. Whether you’re an educator, trainer, or business professional, conveying information in an engaging and memorable way is paramount. One tool that stands out in the realm of instructional design is SmartTutor 360. In this article, we’ll delve into the intricacies of using SmartTutor 360 to craft high-quality presentations that captivate and inform.
Understanding SmartTutor 360
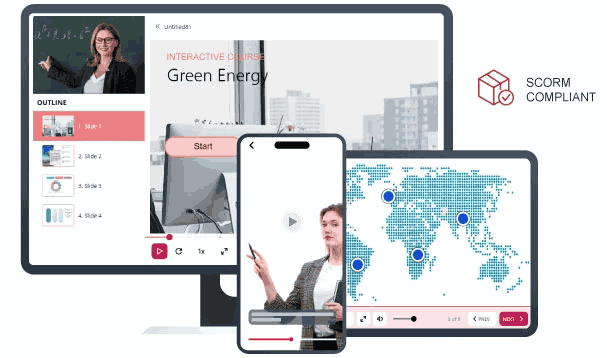
SmartTutor 360 is more than just your average presentation software. It’s a comprehensive authoring tool that allows users to create interactive e-learning content, software simulations, video editing, and more. With its intuitive interface and robust feature set, SmartTutor 360 empowers users to design dynamic presentations that go beyond traditional slideshows.
Step 1: Planning Your Course
Before diving into SmartTutor 360, it’s essential to have a clear plan for your course. Determine your objectives, target audience, and key messages. Outline the structure of your course, including the topics you’ll cover and the order in which they’ll be presented. Having a well-defined plan will guide your content creation process and ensure that your course effectively communicates your message.
Step 2: Creating Content
With your plan in place, it’s time to start creating your course content in SmartTutor 360. Utilize the software’s screen recording feature to capture video demonstrations, software simulations, or slide presentations. Record audio narration to accompany your visuals and provide additional context. SmartTutor 360 also offers a range of annotation tools, allowing you to highlight important points, add text captions, and draw attention to specific areas of your presentation.
Step 3: Enhancing Engagement
To keep your audience engaged, leverage SmartTutor 360’s interactive features. Incorporate quizzes, interactive simulations, and branching scenarios to encourage active participation and reinforce learning. Use animations and transitions to add visual interest and create a dynamic viewing experience. By incorporating interactive elements, you transform your course from a passive viewing experience into an engaging learning opportunity.
Step 4: Fine-Tuning and Polishing
Once you’ve created your course content, take the time to fine-tune and polish it in SmartTutor 360. Review your recordings and audio narration for clarity and coherence. Make adjustments to your visuals and annotations to ensure they support your message effectively. Pay attention to the pacing of your course, ensuring that it flows smoothly and holds the audience’s attention from start to finish.
Step 5: Sharing Your Course
With your course complete, it’s time to share it with your audience. SmartTutor 360 offers multiple options for sharing your content, including exporting it to video formats, HTML5, SCORM, xAPI or uploading it directly to e-learning platforms. Choose the format that best suits your needs and audience preferences. Whether you’re delivering your course in-person or online, SmartTutor 360 provides the flexibility to reach your audience wherever they are.
Conclusion
In conclusion, SmartTutor 360 is a powerful tool for creating high-quality course that engage and inform. By following the steps outlined in this article, you can leverage SmartTutor 360 features to design dynamic courses that captivate your audience and effectively convey your message. Whether you’re a teacher, trainer, or business professional, SmartTutor 360 empowers you to create courses that make a lasting impact.
To become an excellent lesson designer with SmartTutor 360, check out some Demos