ActivePresenter allows you to animate objects with four types of animation effects: Entrance, Exit, Emphasis and Motion Path. Easy to add, edit and remove animation effects, this tutorial gives you all details about how to do that.
SmartTutor 360 has a gallery of entrance, exit, emphasis, and motion path animations that you can apply to shapes, images, text, icons, and more. Easy to add, edit and remove animation effects.
Overview of Animations
- Entrance: Control how an object enters a slide. Entrance effects start at the start point of an object (the left edge of the object time bar). For example, an object will move slowly into a slide with a Float In effect.
- Exit: Control how an object exits a slide. Exit effects end at the end point of an object (the right edge of the object time bar). For example, with the Zoom Out effect, an object will gradually scale down and disappear.
- Emphasis: Animate objects that are already in a slide. These effects make an object change its size, transparency, shake, or spin on its center. For example, you can set an object to shake with the Teeter effect.
- Motion Path: Move objects already in a slide along a predetermined path, like a line, circle, or a star. You can also draw your own paths.
Adding Animations
Here’s how to add an animation to an object:
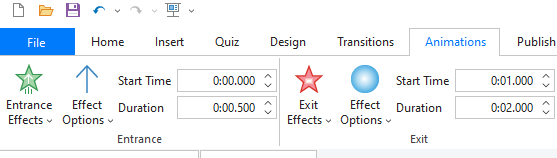
- Select the object and go to the Animations tab on the ribbon.
- Click the star icon for the type of animation you want to add (entrance, exit, emphasis, or motion path).
- Choose an animation from the gallery.
Notes:
- You can add animations to objects on your slides, slide master, feedback master and states
- Each object in your course can have one entrance animation, one exit animation, multiple emphasis animations, and multiple motion path animations.
Adjusting the Speed of an Animation
Entrance, exit, and emphasis animations default to a duration of 0.5 seconds.. You can make them faster or slower by entering a time in the Duration field for the animation.
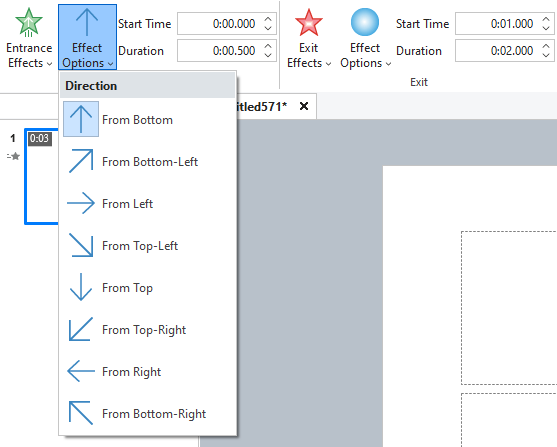
Choosing Effect and Path Options
You can tweak the behavior of most animations by choosing Effect Options (for entrance, exit, emphasis and motion path animations).
Edit Animation Effects
After adding effect to objects, the object Time Bars will display the green bars (for entrance effects), red bars (for exit effects), and yellow bars (for emphasis and motion path effects).
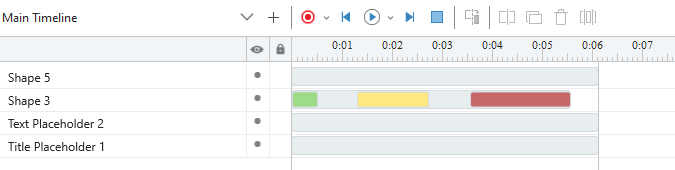
To edit animation effects, select the object and do one of the following:
- Drag the effect time bars in the Timeline pane to change the duration and start time of the effect.
- Double-click an effect time bar or right-click an effect time bar and select Animation Settings to open the settings dialog corresponding to each effect type. Edit effect’s properties and click OK to save changes.
Remove Animation Effects
To remove an animation effect, do one of the following:
- In the Timeline pane, select an effect time bar. Drag the mouse downward out of the time bar until the effect time bar turns into gray, and then release the mouse button.
- Right-click the effect time bar in the Timeline pane > Remove Animation.
- Select the object, go to the Animations tab > None.
- For motion path effects, you can also select it on the Canvas and press the DELETE key.