SmartTutor 360 is a powerful tool for creating engaging e-learning course, and one of the key features you can use to enhance your visuals is the cropping feature. Cropping allows you to focus on a specific part of an image and remove any unwanted elements. In this article, we will explore how you can use the cropping feature in SmartTutor to enhance your course
Understanding the Cropping Feature in SmartTutor 360
The cropping feature in SmartTutor allows you to remove parts of an image that you do not want to include in your presentation. When you crop an image, you can remove unwanted elements, adjust the aspect ratio, or focus on a specific part of the picture. Cropping is an essential feature that can help you to refine your visuals and make them more impactful.
An useful tip is to use the gridlines and guides in SmartTutor 360 to align your cropped image with other elements on the slide. This can help to create a more professional and polished look for your presentation. To enable gridlines and guides, go to the View tab and select Gridlines and Guides from the Show group.
Step-by-Step Guide to Crop a Picture in SmartTutor 360
The following is a step-by-step guide to cropping a picture in SmartTutor:
- Select the image you want to crop.
- Click on the ‘Format’ tab in the top menu.
- Click on the ‘Crop’ option in the ‘Crop’ group.
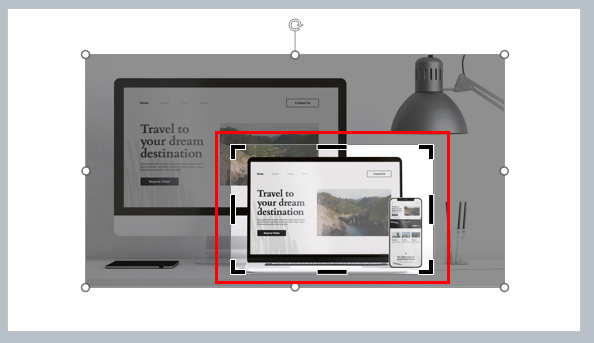
- Adjust the crop handles to select the area of the image you want to keep.
- Click outside the image to apply the crop.

Crop to Shape
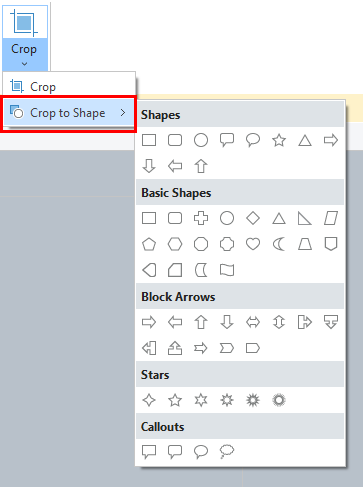
If you want to change the outline of a photo to make it a shape (like a circle or rounded rectangle), use the cropping tool on the ribbon with the Crop to Shape option.
- Use Insert > Picture to add the image
- Click the picture.You may crop multiple pictures at once, but you must crop them to the same shape
- Click Format tab, and in the Crop group, click the arrow under Crop.
- From the menu that appears, select Crop to Shape, and then click the shape you want to crop to.The shape is immediately applied to the image.
