SmartTutor allows you to add or edit cursor paths and upload custom cursors to create professional looking videos such as:
- Software or product demos
- Instructional or how-to videos
- Business presentations and recorded slideshows
Cursors are used to tell a story, draw viewers’ attention to key parts of the screen, or add polish to a video.
Emphasize a button or link with your cursor, match your voice narration with the on-screen cursor movement, correct a mistake made with the cursor during recording, and much more.

Adding Mouse Paths
Mouse Paths objects are generated in two different ways:
- While capturing screen with annotation, SmartTutor records your mouse movements and converts them into mouse paths. You can edit these paths by adding mouse click sounds and effects in the edit phase.
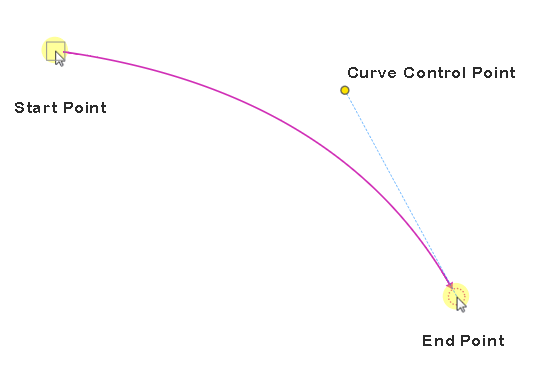
- When editing a project, you can insert your own cursor path and style the path the way you want. In general, the idea is to insert a cursor path, then add points to the path and place them over buttons or other clickable objects. Optionally, you can add click points, where SmartTutor produces the click sound in the rendered project.
Customizing Mouse Paths Styles
Mouse
| Name | Description |
| Pointer | Change the pointer icon. Choose Apply to All to Apply the style of the selected cursor path to all cursor path objects in the current project. |
| Click Type | Apply the style of the selected cursor path to all mouse paths in the current project. |
| Speed | The speed of the mouse movement. check to set fixed speed |
Timing
https://apaxlearning.com/wp-content/uploads/tutorials/mouse_paths_01.png
https://apaxlearning.com/wp-content/uploads/tutorials/mouse_paths_01.png
https://apaxlearning.com/wp-content/uploads/tutorials/mouse_paths_01.png
https://apaxlearning.com/wp-content/uploads/tutorials/mouse_paths_01.png