In this user guide, we’ll explore how to record new video screen in SmartTutor 360
Step 1: Launch the Screen Recorder
There are several ways to launch the screen recorder. Here are the three quickest ways:
- On the SmartTutor start screen, click Record Screen to begin a new project by recording your screen.
- In an existing project, go to the File tab on the ribbon and click Record Screen.
- In Slide View, go to the Home tab on the ribbon, and click the top half of the Record Screen button
The SmartTutor application window will temporarily disappear and the screen recorder will launch (but it won’t start recording right away).
Step 2: Recording Modes
With SmartTutor, you can record exactly what you want:
- Screen
- Camera
- Both screen and camera at the same time
You can select the recording mode and adjust the additional settings for it in the Recording Settings dialog.
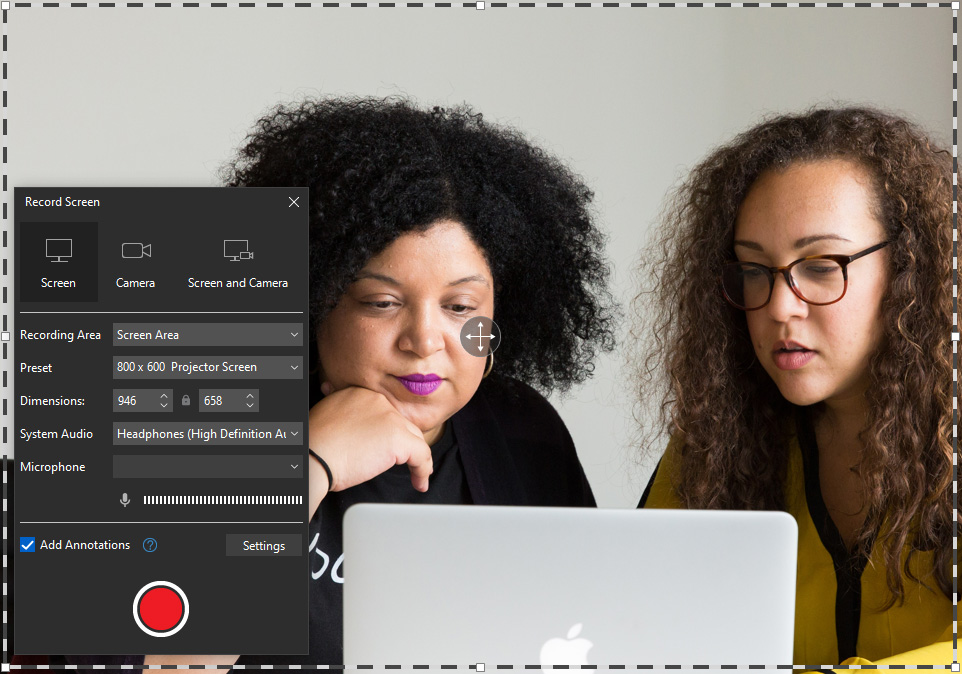
Step 3: Select Your Recording Options
When the screen recorder appears, the first thing you’ll want to do is set your recording options. Click the Settings button on the screen recording window.
When the Recording Settings dialog opens, configure the following settings and click OK.
Step 4: Size and Position the Recording Area
To adjust the size of your recording area, drag the sizing handles on the dashed outline or use the drop-down list on the control bar to choose preset dimensions. To adjust the location of your recording area, just drag it to a different area of your screen.
In the Recording Area choice, configure the following options:
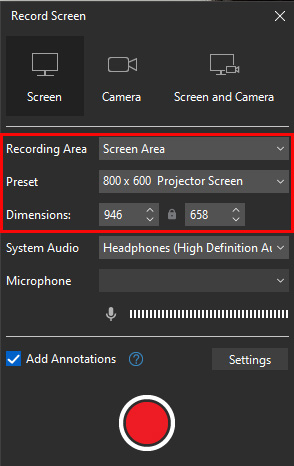
- Screen Area: Select this option if you want to record your project using a specific dimension. You can choose from a list of standard sizes or create your own custom-sized screen.
- Fullscreen capture: Select this option if you want to set the size of the recording window to the size of your computer screen. The entire computer screen is treated as the recording window. If you work on dual monitors, you can choose the monitor that you want to use for recording.
- Application window: Select this option if you want to record the entire application window. The dimensions of the application aren’t altered. The recording rectangle is resized to fit the application.
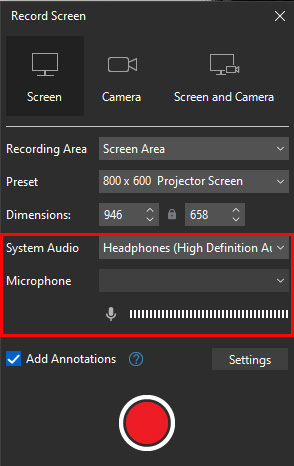
Select the microphone with which you want to narrate during recording. You can select the built-in microphone on your machine or use an external microphone.
Step 5: Start a new recording
- Click Start a new recording in the Record Screen window (the round red button).
- The countdown will start, after which you can start recording.
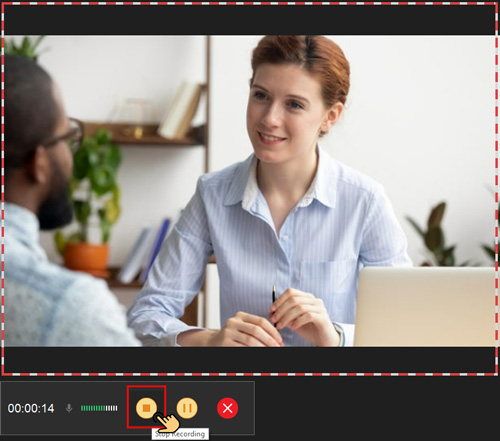
- If you are recording a screen area, then next to the recording area you will see a control panel on which you can pause recording, end the recording and save the changes, restart recording.

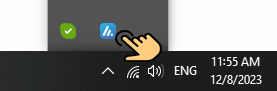
When you record the full screen, the control panel is not displayed so as not to interfere with recording. You can manage the recording using hotkeys or the menu in the notification area next to the clock. The menu opens by right-clicking on the SmartTutor 360 icon in the tray.
Step 6 : Stop Recording
To end the recording and go to edit, click Stop on the control panel or F10 on the keyboard. (Note that F10 is the default hotkey, but you may change it in the settings. The hotkey to stop the recording will be shown during the countdown).
When you stop the recording, a video slide will created. In it, you can edit the recording, add other videos, labels, images and shapes to it, and set up smooth transitions between the segments of the recording.