Go to the File tab on the Storyline ribbon and click Options. The following window will appear where you can adjust the options described below.
Setting General Options
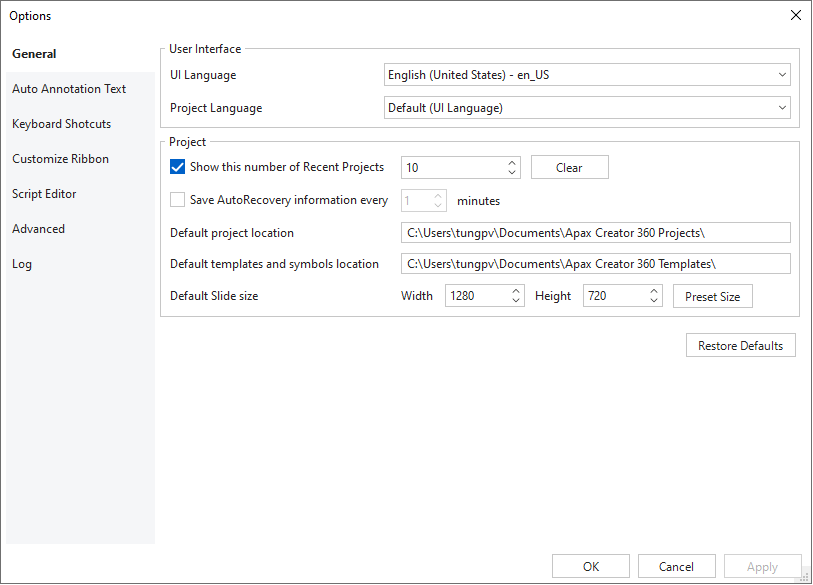
Use the General tab of the Options window to adjust these settings:
User Interface
You can localize the SmartTutor 360 interface in English
To change the project language (use in HTML5, LMS publishing), you can change the Project Language
Project
Use the Project field of the SmartTutor 360 Options window to adjust these settings:
| Save AutoRecovery information every ___ minutes | Mark this box to recover your work if you experience a power outage or the app shuts down unexpectedly. SmartTutor will automatically save a copy of your project at the specified interval (after you’ve saved it at least once).The default interval is every 5 minutes, but you can enter any whole number between 1 and 60. If SmartTutor closes unexpectedly, you’ll be prompted to recover your project the next time you open it. |
| Show this number of Recent Projects | Limit 15 recent projects. Clear to delete all recent project |
| Default project location | Change default project location when choose Save As…Default Location : \Documents\SmartTutor360 Projects\ |
| Default templates and symbols location | Change default slide templates and symbol package.First, to save a project as an object template, click File > Save or Save As…. Then, select SmartTutor 360 Template (*.tutortemplate) from the Save as type list > click Save.
Normally, your file saves in the SmartTutor 360 Template folder \Documents\SmartTutor360 Templates. After that, you can rename, remove, or share the template file with others in the normal way. Note: In case you save the project as SmartTutor 360 Template in other folders on your computer, the slide template will not appear when insert slide from My Templates. |
| Default Slide size | The app also allows you to change the default slide size. The default size of an SmartTutor 360 project is 1280×720 (width x height) in pixels |
Keyboard Shortcuts Options
SmartTutor has dozens of keyboard shortcuts to help you work faster. See the complete list here.
Customize Ribbon Options
You can personalize your ribbon to arrange tabs and commands in the order you want them, hide or unhide your ribbon, and hide those commands you use less often.
See this user guide for details.
Script Editor Options
Use this tab to customize JavaScript coding options. The tab has three parts. The Color box to the left
lets you change syntax highlighting preferences. The View box in the center lists some code view
options. The Preview box to the right allows you to preview the coding content.
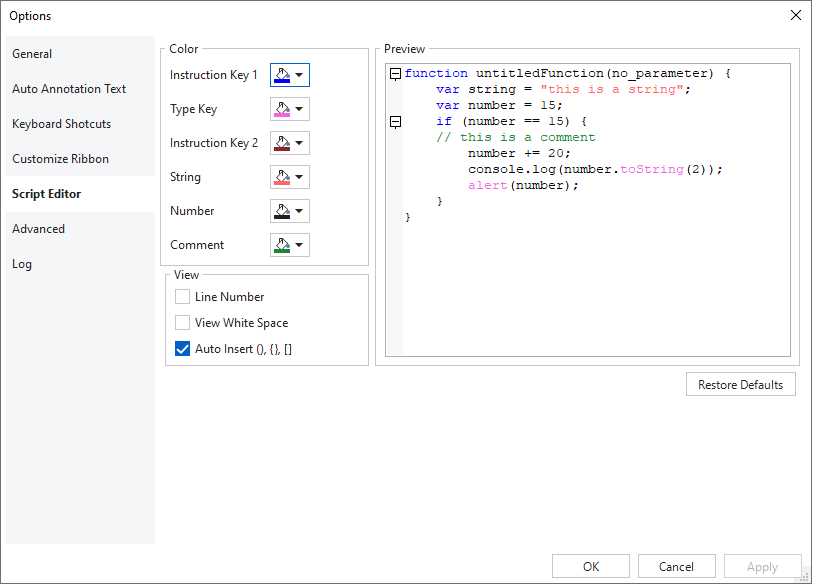
To customize syntax highlighting preferences, click the color rectangle next to each element and
change the color. All changes you make are immediately reflected in the preview editor on the
right side.
Below are the code view options:
● Line Number: Display line numbers along the side of the code.
● View White Space: Display dots in place of white space.
● Auto Insert (), {}, []: Selected by default. This option automatically inserts matching
closing brackets to the code.
You can always go back to the default settings by clicking the Restore Defaults button. All your
customization will be removed.
Advanced Options
| Automatically Check for Updates | SmartTutor 360 periodically checks for updates when it starts. Selected by default. |
| Proxy Settings | Set connection settings to use a proxy (no proxy, use system settings (default), manual configuration. Check with your admin and set the value. |
| Warning none-ANSI path when publish | When you publish your project, some outputs cannot be opened or run properly if the file name contains non-ANSI characters. This option specifies whether you should be asked in such cases or not. Selected by default. |
| Show language confirmation when importing XLIFF | When you import from XLIFF, chances are that the target language is unspecified or invalid. A language confirmation will appear letting you select a target language to continue. Selected by default |
| Extend object duration to match the duration of generated audio | If you’re using SmartTutor 360 software and you want to synchronize the duration of an object with the duration of a generated audio (text-to-speech). |
| Reset [Don’t show again] prompts | Reset all [Don’t show again] prompts |
| Maximum size of original file saved directly into project | When a file is inserted to a project, SmartTutor creates a copy of the file and stores it in that project (to ensure that even if you rename, move, or delete the original file, the inserted item will not be affected).If the original file is large, storing it directly in the project will consume more disk space than necessary, which severely reduces the performance and prone to errors that might corrupt the project. |
| Video Encoder | Select the encoder for encoding with H.264 and HEVC video codecs. |
| Video decoding | Hardware decoding means that your client computer’s hardware is using a chip in it made specifically for decoding video. If you don’t have this chip in your GPU, SmartTutor 360 will use automatically use software mode (software decoding), which is a slower method that uses the CPU instead.If you select Software decoding, SmartTutor will always use CPU for decoding video. |
| Rendering mode | Select Software rendering (CPU rendering) if the program has problems when rendering video objects. Default use Hardware rendering (GPU rendering) to increase video rendering performance. |
| Use Direct3D for recording screen | Select this option to increase the recording frame rate. Deselect it if there is any recording problem. |
| Make JPEG full-RGB when publishing video | Select this option to fix the “white color turns grey” issue when viewing output videos if it occurs |
Log Options
System logs are records generated by various software, applications, or operating systems, capturing important events, errors, and activities. To view log, click View Logs to open logged files.
Choose Enabling Verbose mode, you can involves more information than the standard or typical logging process.