Text styles are a useful tool for managing the visual presentation of text elements, such as paragraphs and headings. By customizing font and paragraph options for each style, you can achieve the desired look and maintain consistency throughout your course. This allows for easy application of changes to the entire project at once in SmartTutor 360. Additionally, text styles provide the opportunity to explore various fonts, colors, sizes, and spacing options. Any updates made to a style will be immediately reflected throughout the project.
Text styles also play an important role in accessibility by making courses easier to navigate with a screen reader.
Formatting the Text
- Open your project in SmartTutor 360.
- Select the text you want to modify.
- On the Home tab, in the Font group, you’ll find a lot of buttons and settings that you can use to customize and modify the text. This group contains everything related to the font and its styles.
- To change the font of a text, select it and click the Font drop-down arrow. You’ll see a list of available fonts.
- Click the one you want to apply. The text will change accordingly.
- To change the size of your text, select it, click the Font Size drop-down arrow and choose the desired value.
- You can also increase or decrease the font size one step at a time by clicking the Increase Font Size or Decrease Font Size buttons respectively.
- Next, we have the Bold, Italic and Underline buttons. The first one is used for emphasis. The second one makes your text lean slightly to the right. The third one draws a line under your text, in case you want to highlight something. To apply any of these styles, select the text and click the corresponding button.
- Perhaps you want to cross out some words from your text. It’s easy to do so. Select the part of the text you want to cross out and click the Strikethrough button.
- Next, we have the Text Highlight Color and Font Color buttons. As their names suggest, the first one determines the color of the highlight and the second one determines the color of the text itself. It’s easy to change any of them: select the text, click the arrow next to Text Highlight Color or Font Color and choose the desired color from the list.
- For the Font Color, if you want a different color not included on the list, you can specify your own. Click More Colors and then, on the Custom tab, enter the RGB or HSL values of your desired color.
- Finally, if you want to remove all the formatting from your text, just select it and click Clear All Formatting.
Text alignment, indentation, and spacing
To make the text on your slides easier to read, you might want to change the spacing between lines of text and between paragraphs in your SmartTutor 360 presentation. You can also adjust the alignment and indentation of lines of text.
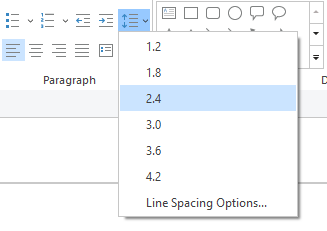
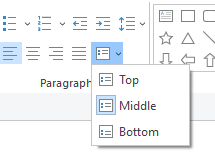
Line spacing (single-space, double-space, and so on) and vertical alignment (top, bottom, or middle) are available from menu buttons on the Home tab of the Ribbon, in the Paragraph group:
There are more detailed spacing options available in the Paragraph dialog box:
- On the slide, select the text that you want to change.
- Click Home, and in the Paragraph group, click the dialog box launcher.
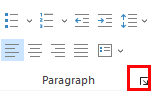
- The Paragraph dialog box appears:
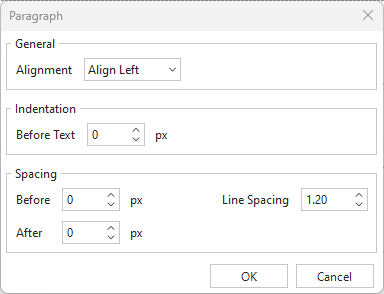
Here are the options available in the dialog box:
Alignment
- To change the horizontal placement of text, in the Alignment box, choose Left, Center, Right, Justified. Justified adds spacing between words so that the lines of text touch both the left and right margins, except for the last line of the paragraph, which uses normal word spacing.
Indentation
- To add indentation or change the amount of indentation before text, select or type a number in the Before text box. You can use the Special options to only indent the first line, or to add a hanging indent.
Indentation is measured in inches, and it can be any whole number or decimal, such as 1.2 inches.
Spacing
- To change the spacing above or below a paragraph, type or click the arrows next to Before or After. This number can be any whole number or a decimal, such as 6.5.
- To change the spacing above and within a paragraph, use the Line Spacing options: Single, 1.5 Lines, or Double. Or select Exactly and then add a point value (between 0 and 1584) in the At box. (The bigger the point value, the wider the spacing.) Or select Multiple and add a value to the At box. (Use any number less than or equal to 9.99: A value of 1 would equal single-spacing, while a value of 3 would equal triple-spacing).