In this guide, we’re going to show you how to make a fun quiz in Moodle and set it up so everyone plays fair and the scores are accurate. We’ll even make a small quiz together to get hands-on practice right away!
To get started, you’ll need to sign up for Moodle Cloud and grab the sample questions we’ll be using.
Usually, making your first quiz in Moodle can take about an hour or two because you need some time to learn how everything works. But there’s a cool tool called SmartTutor 360 that can help you make quizzes twice as fast! We’ll show you how it works, and then you can choose which tool you like best.
Now, let’s get started.
Step 1: Create a New Course
You can’t just open Moodle and start making a quiz right away. First, you need to make an online course in Moodle and fill in the course details. After that, you’ll be able to add quizzes for tests or ongoing activities.
To make a new course, follow these steps: Go to Site Administration → Courses → Add a New Course.
Next, type in a full name and a short name for your course. Then, look for the Course Format tab below and choose “1” for the Number of sections.
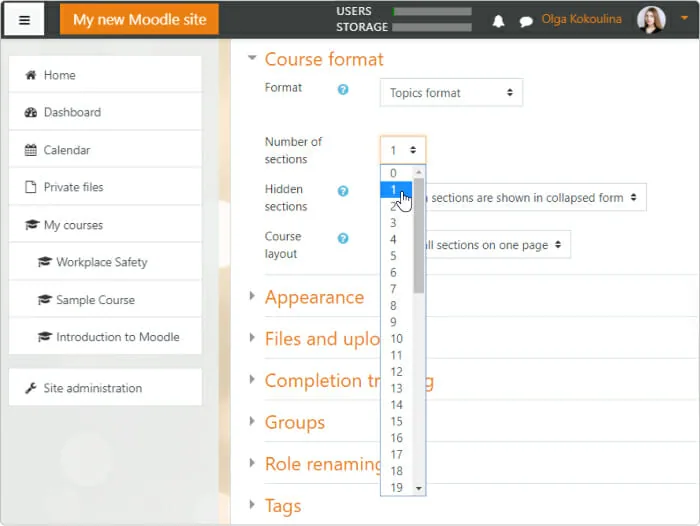
A Moodle course is kind of like a book. It has chapters, or sections, where you add lessons and activities. You usually decide how many sections you want at the beginning.
There are also some other settings you can change, like when the course starts and ends, and how it looks — but we’ll talk about those later. For now, scroll down the page and click Save and Display.
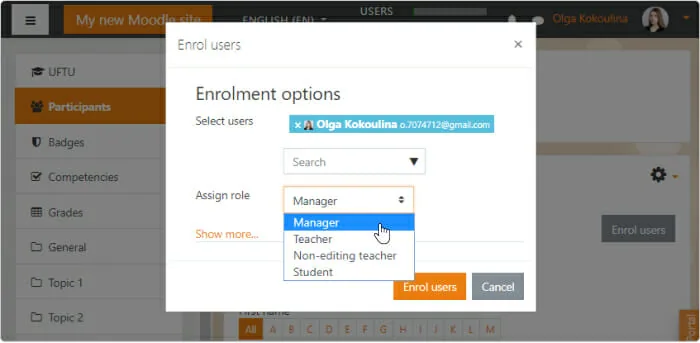
Your course is ready! Now, you need to give yourself special access so it shows up in your profile. Click Enrol users, type your name in the pop-up window, and choose Manager from the dropdown menu. Then click Enrol users.
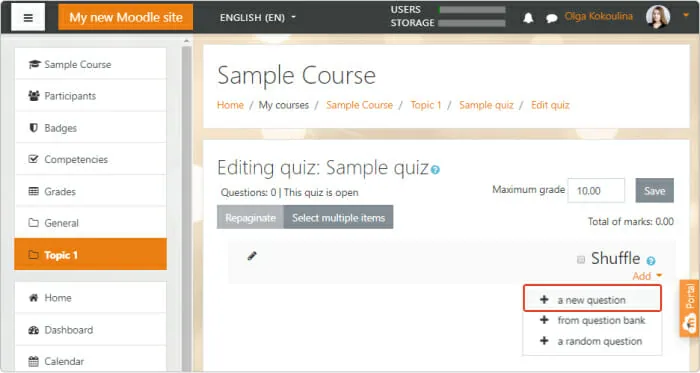
Step 2: Add and Set Up a Quiz
Now you can add a quiz to Moodle. Click Proceed to course content → Add an activity or resource. A Moodle toolbar will show up on your screen. In the Activities section, pick Quiz → Add.
Give your quiz a name and write a description. It’s also important to set some options to make sure your learners play fair and don’t cheat.
Quiz Settings in Moodle
You can find details about each option in this Moodle help doc, but in this article, we’ll go over the basics.
Setting #1: Timing – Protect from cheating
By default, learners have as much time as they want to finish the exam; they could start today and finish in three days, getting the highest score by looking up all the answers in their textbooks.
To make sure the results are fair, we’ll set a time period and a time limit for the test.
Assessment period
Let’s have the test automatically open on September 17 at 11:00. Until then, learners will only see the exam description in their accounts.
The test will close on September 18 at 12:00. If a learner forgets to take the test in time, they’ll automatically fail.
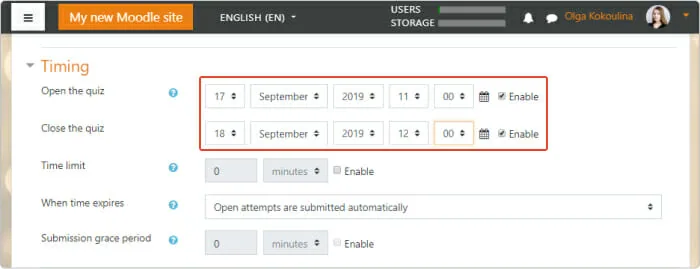
The rest of the options in this section can be left as they are by default.
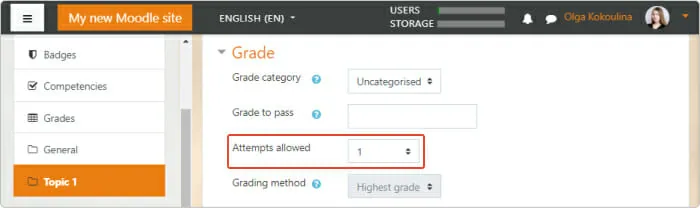
Setting #2: Grade – Set a passing grade
With the default settings, learners can try as many times as they want to answer the same question. This means they could pass the quiz by just guessing: they make a mistake, change the answer, and keep trying until they get it right. If you want to make sure learners aren’t just guessing, you can limit the number of attempts and set a passing score.
Number of attempts
If this is a final exam, you might want to allow only one try. For a smaller quiz, like a pop quiz, you could allow three tries.
Passing grade
This is the minimum score needed to pass a quiz. When a learner passes, their grade will be highlighted in green, and if they don’t pass, it will be shown in red.
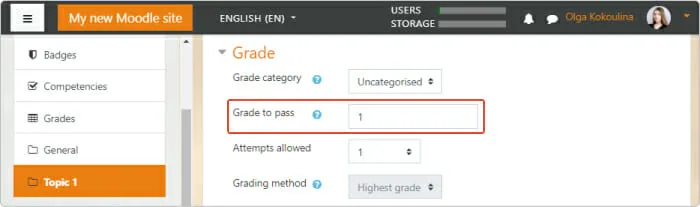
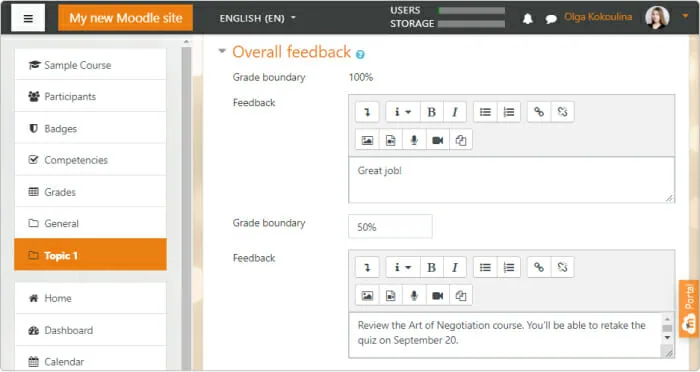
As there are only two questions in our sample quiz, let’s set one point as the passing grade.
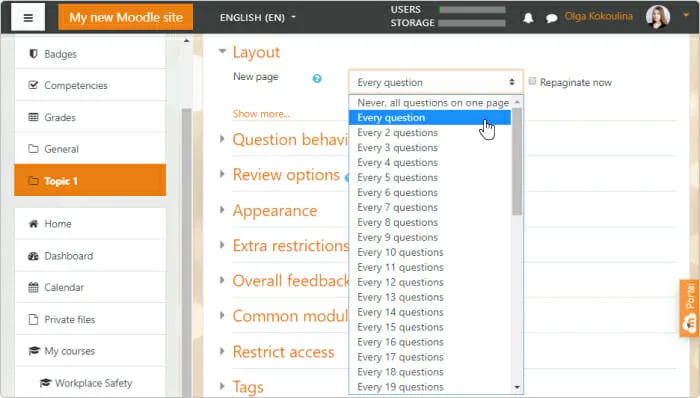
Setting #3: Layout – Build a structure
You can organize your quiz by grouping questions into sections. You can choose to put each question on its own page, or have all the questions on one page.
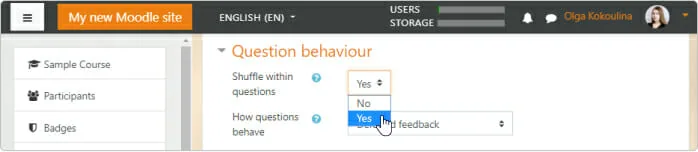
Setting #4: Question behavior – Shuffle answers
To help prevent cheating, choose “Yes” for the Shuffle within questions option. This will mix up the answer choices each time a learner takes the quiz, so they won’t see the answers in the same order.
Setting #5: Overall feedback – Provide a final comment
Overall feedback is a message that learners see after they finish the quiz. You can write different messages based on their final score: give praise to those who did well and let those who didn’t do so great know how they can try again.
For now, we’re done with the main settings. Click Save and Display. The system will forward you to a new page:
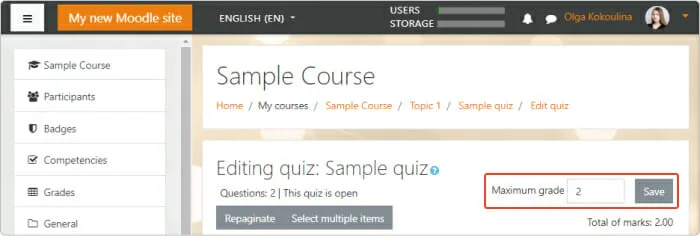
We already set the minimum passing grade for the quiz. Now, we need to set the highest score. Click Edit quiz and type in the highest score where it appears after you click. Since our sample quiz has just two questions, the highest score will be two points.
Step 3: Create Tasks for Assessment
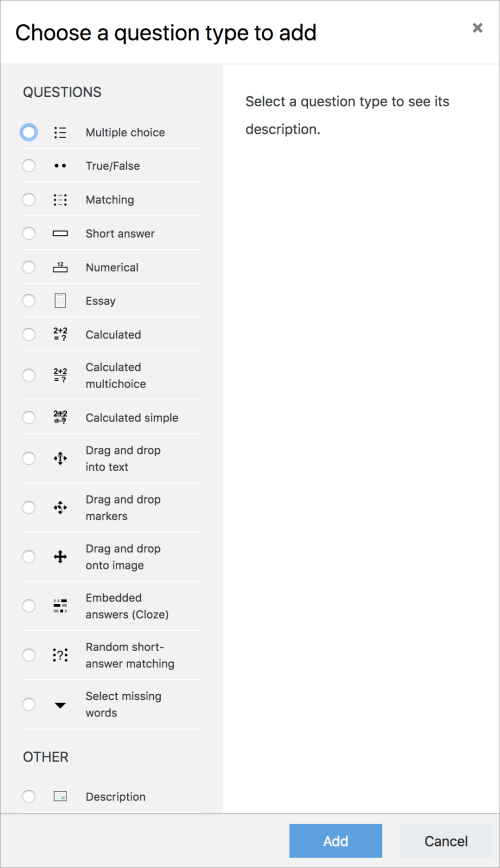
In MoodleCloud, there are 15 types of questions.
Example True/False Question
To add a True/False question, click Add → a new question → True/False → Add.
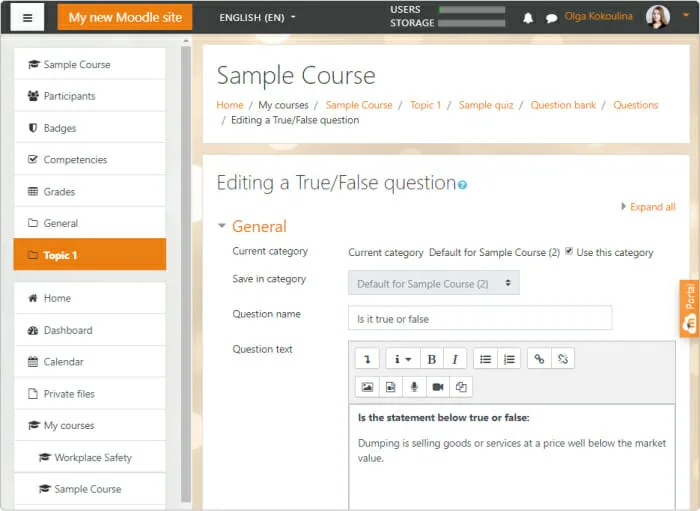
In the new window, fill in a question name and question text (here’s the source file for the sample quiz). You can also add images, video, audio, or a link to additional material on the topic of the question.
Then set the correct answer. In our sample, the statement is true, so choose True in the dropdown list.
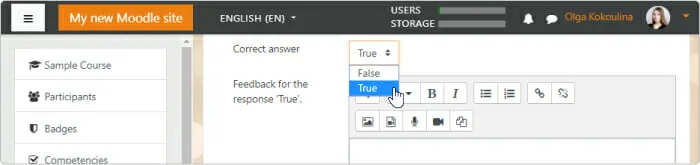
By default, learners get one point for each correct answer, but you can give more points if you want. You can also add feedback for each answer to help learners understand the topic better and improve next time.
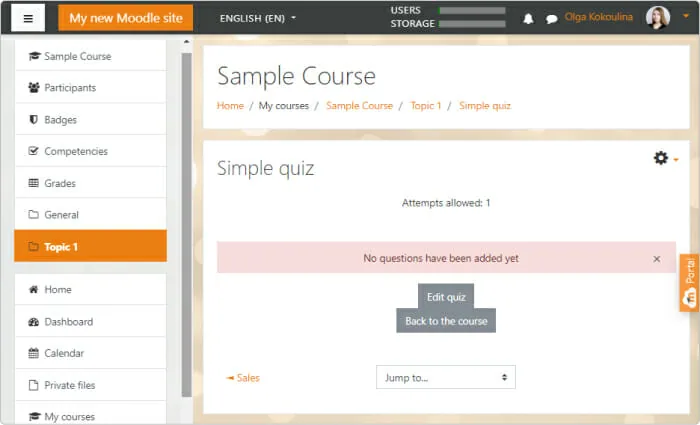
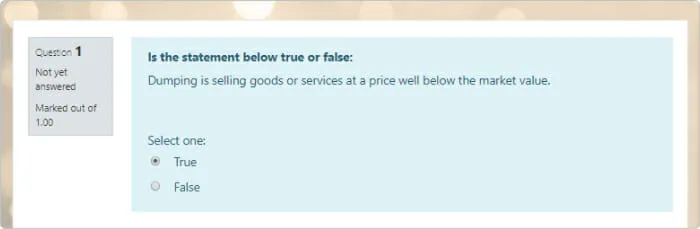
Click Save changes to publish the quiz. It will look like this:
Step 4: Open a Question Bank
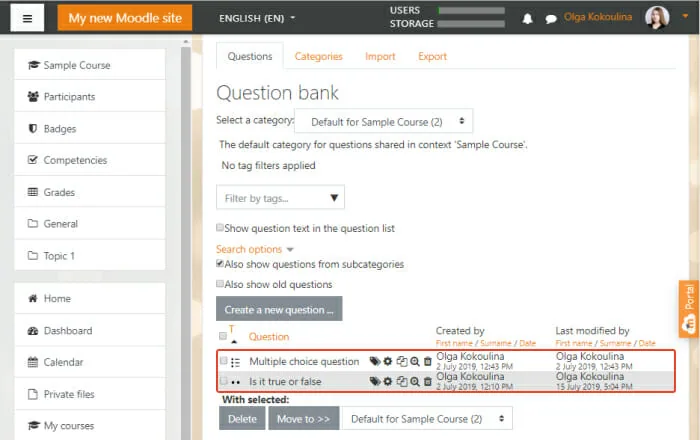
So far, we’ve talked about making a quiz from scratch. If you’re going to give regular online tests in distance learning, it’s handy to use a question bank.
A question bank in Moodle is like a big collection of all the questions and tasks you’ve made on the platform. It saves time because you don’t have to create everything from the beginning. If you need to make a test for a new course, you can just copy questions from the bank.
The two questions we made as a sample are already in the bank. To find them, go to the course page in your account.
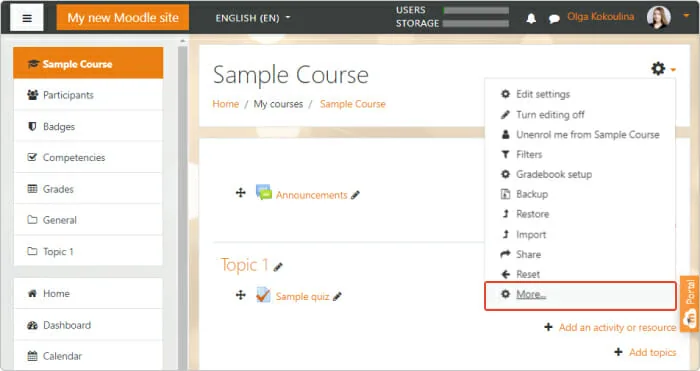
Choose More from the dropdown menu and click Question bank in the new window. On this page, you can create new tasks and find the ones you’ve already used.