Do you want to use the eLearning content created in SmartTutor 360 in Moodle? It’s simple, Moodle, a SCORM 1.2 compatible LMS, cannot create SCORM content, but allows you to add SCORM package zip files to the system. You can then edit or share it later.
To upload SCORM to Moodle quickly and easy, we will do it in 4 steps.
Upload SCORM Course into Moodle LMS
Why is SCORM used in LMSs? Because it ensures that your courses are perfectly supported by your LMS, and it can also transition smoothly between different learning management systems. Moodle is no exception.
Now we will step-by-step to upload a SCORM package into Moodle
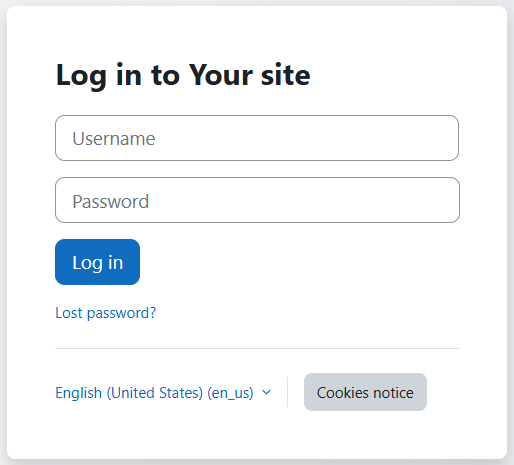
Step 1. Login in to your Moodle LMS
Before you add a SCORM file, go to your Moodle LMS to login
If you have not set up your own Moodle site, You can create moodle LMS in 2 ways
- Option 1: Go to the Moodle Cloud website to create a Moodle LMS with name *.moodlecloud.com ( example: https://apaxlearning.moodlecloud.com/)
- Option 2: Installing Moodle on Your Own Server
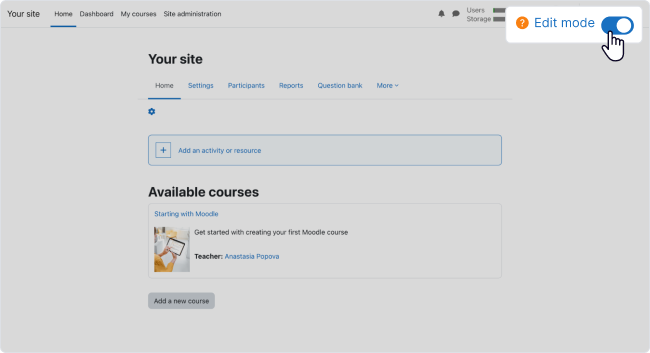
Step 2. Turn on the Edit mode
In the top right corner of the Home screen, you’ll see the Edit mode toggle switch. Turn editing on. This will allow you to upload new files with SCORM activities.
Step 3. Upload your SCORM package to the Moodle LMS
1. Now, to add your SCORM source, choose Add an activity or resource in the center of the Home screen of your Moodle site.
2. Select SCORM package from the drop-down menu. Use the search bar above the menu to find the SCORM item quickly.
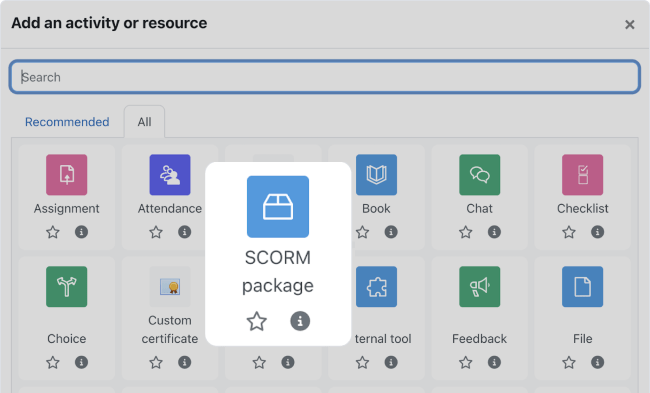
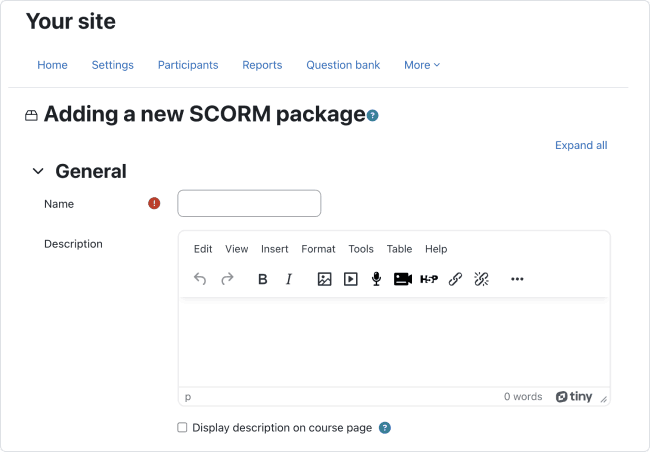
3. Once you’ve clicked on the SCORM package item, the Adding a new SCORM package page will open. First, add a name and a short description of your course.
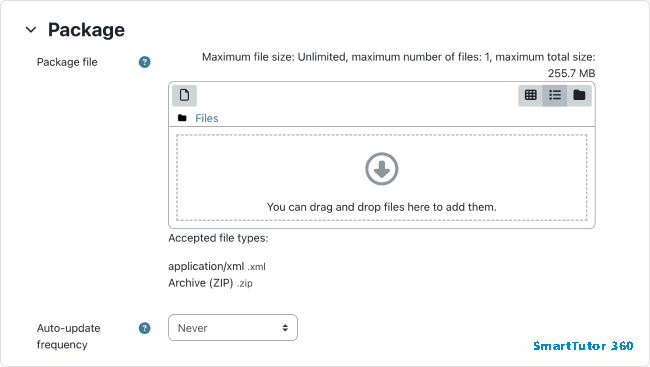
4. Choose the zip file created by SmartTutor 360, or another tool and upload it to Moodle (or you can drag and drop your SCORM course zip archive from your computer into the box).
5. After you’ve chosen the SCORM package, you can go through the main settings for your course. Choose the course’s appearance, availability, grading method, access limits, common module settings, etc.
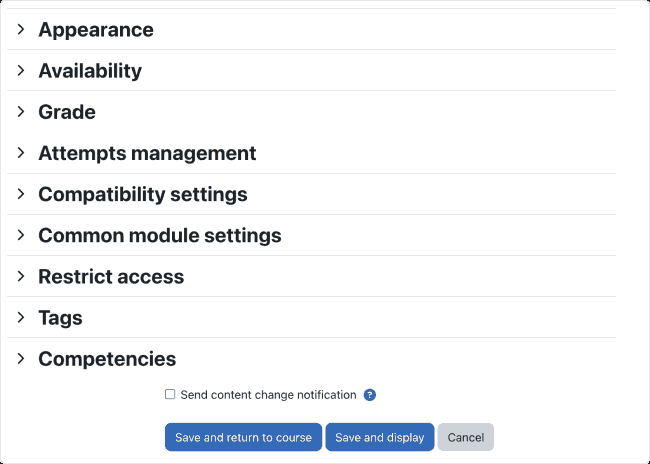
Click Save and return to course if you want to edit the course before sharing it. Click Save and display if you’re ready to publish your content.
Step 4. Manage and edit your SCORM zip file (optional)
Go to Settings –> SCORM/AICC administration –> Edit settings or simply click on the Edit icon next to the SCORM package to edit your SCORM file via site administration
How to Create a SCORM Package for Moodle
Now that you know how to import SCORM packages into Moodle, let’s see where we can get these SCORM modules for your courses. We will explore two main scenarios:
-
Exporting a SCORM activity from SmartTutor 360
-
Creating an eLearning course directly in Moodle
Exporting a SCORM package from SmartTutor 360
If you’re working on your eLearning content with an authoring tool like SmartTutor 360, you’ll need to export it into SCORM to upload it to Moodle later on. This is a simple 5-step process.
1. Open SmartTutor 360 and go to project you want to export.
2. Once your course or lesson is ready, click Publish on the ribbon.

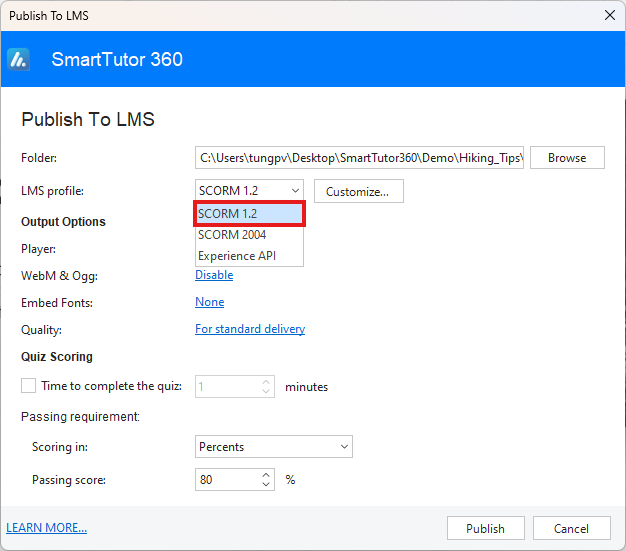
3. Select the LMS tab in the pop-up menu. Use these settings to customize your content for a learning management system like Moodle.
4. Choose a folder on your desktop where you want to save your content. Under LMS Profile, select SCORM 1.2 – this is the format supported by Moodle.
5. Click Publish. The zip archive with your eLearning course will be saved in the designated folder.
Now you can import this file to Moodle as a SCORM activity , following the steps outlined in the previous section of this guide.
Creating an eLearning course in Moodle
Moodle allows you to build a course directly on the platform, taking advantage of its robust features. You can add lessons, quizzes, explore content organization, and even set up a gradebook for your students—Moodle offers a wide range of functionalities to enhance your course.
