In this user guide, we’ll explore how to record new screencasts in SmartTutor 360. (To insert a previously-recorded screencast into your course as a video or a series of step-by-step slides, see this user guide.)

Step 1: Launch the Screen Recorder
There are several ways to launch the screen recorder. Here are the three quickest ways:
- On the SmartTutor start screen, click Record Screen to begin a new project by recording your screen.
- In an existing project, go to the Slides tab on the ribbon and click Record Screen.
- In Project View, go to the Home tab on the ribbon, and click the top half of the Record Screen button.
The SmartTutor window will temporarily disappear and the screen recorder will launch (but it won’t start recording right away).
Step 2: Select Your Recording Options
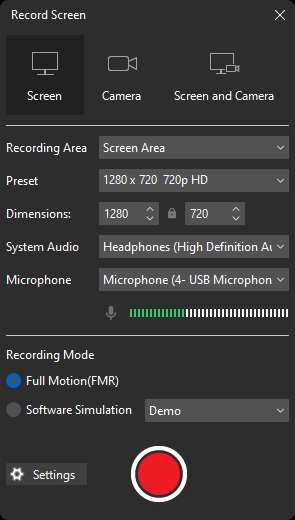
When the screen recorder appears, the first thing you’ll want to do is set your recording options.
Screen Recoding
| Recording Area | Screen Area : Record a portion of the screen. Application: Record the activity of a specific application. Fullscreen: Record full screen |
| Preset | Available screen sizes. |
| Dimensions | Adjust the size of the screen recording area |
| System Audio | Set up System Audio Recording. |
| Microphone | Set up your microphone. If you have multiple microphones, select the one you want to use here. |
| Recording Mode | Full Motion Software Simulation |
Camera Recording
SmartTutor 360 allows you to record a video from the webcam connected to your computer.
To enable the camera mode, select the Camera option in the Recording window.
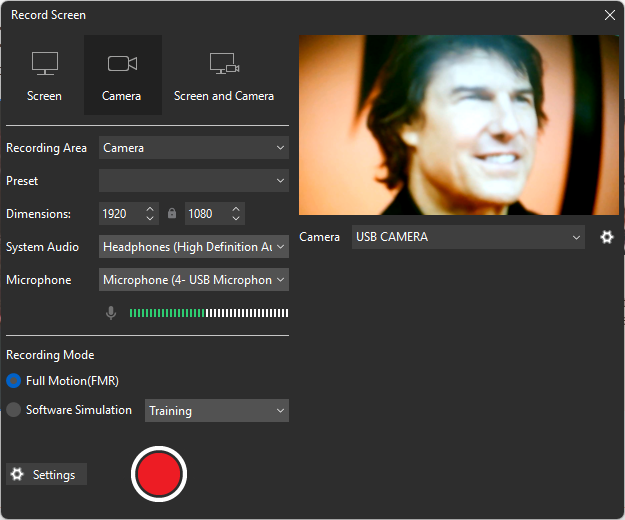
You can click the Camera dropdown to choose a detected webcam device from the list.
Screen and Camera Recording
You can then customize the screen area you want to record by dragging and adjusting the border or selecting a specific window. You can also enable your camera to capture your image while recording the screen
This feature is particularly useful for creating educational videos or technical guides, offering a flexible combination of screen visuals and camera footage to provide an engaging and easy-to-understand experience for your audience.
Recording Mode
SmartTutor 360 is a versatile tool for creating instructional videos and tutorials, offering two main recording modes: Full Motion and Software Simulation.
- The Full Motion (FMR) mode allows you to capture everything happening on your screen, including smooth mouse movements and quick actions, making it ideal for creating visually engaging and dynamic videos.
- On the other hand, the Software Simulation mode records specific steps as you interact with software, such as mouse clicks, data entry, and navigating between windows, helping to create detailed and easy-to-follow tutorials.
The combination of these two modes in SmartTutor 360 provides maximum flexibility for users, enabling them to choose the recording method that best suits the content they want to deliver, from theoretical lessons to in-depth technical guides.
That’s how to record video screen in SmartTutor 360. Visit our Tutorial page, and YouTube channel for more tips and tricks using this app.