System audio refers to the audio from your computer’s speakers. For example, audio associated with YouTube videos or the sound you hear when error messages pop-up in some applications. SmartTutor 360 lets you capture or record system audio while recording a software simulation or a video demo. You can also add system audio to a slide after creating a project by recording or importing.
Record System Audio and Narration Simultaneously
When record the screen, you can be record system audio and narration at same time. To do this, when record screen, select one device detected from:
- The Microphone section to record your narration from the microphone.
- The System Audio section to have audio from the computer system in your recorded video.

The volume of the audio can be changed easily by using the Adjust Volume tool on your computer.
Note: When you select to record system audio, all of the sounds on your computer including app notifications will be recorded. So, you should turn off notification sounds of unused apps to avoid any unwanted sounds.
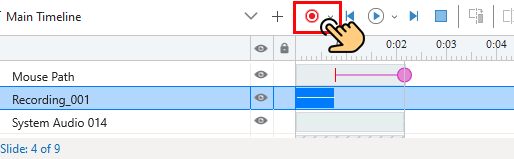
When all the settings are done, you just click the Record button (red circle button) to record audio and screen at the same time.
Record Narration Separately
If you want to record your voice after the recording screen then the Record Narration feature comes to your aid. This feature is available in the Timeline pane in the editor.
- Click the drop-down arrow to open Input Device Dialog.
- Select a device from the Input Device list and adjust the volume if needed. And press OK.
- Click the Record Narration button in the Timeline pane to start recording your voice. To pause the recording, click on the Pause/Resume button .
- When you want to finish recording narration, click on the Stop button.
- Or the recording will automatically stop when it reaches the end of the slide.