In SmartTutor 360 you can add or remove automatic slide numbers, hide numbering on the title slide, and move slide numbers. You can also add the date and time to slides.
Add slide numbers to slide
- On the Insert tab, select Footer.
- On the Slide Footer window, check the Slide number box.

If you don’t want a number to appear on the title slide, also check the Don’t show on title slide box. - Select Apply to All.
Add the date and time
- On the Insert tab, in the Illustrations group, click Footer.The Slide Footer dialog box opens.
- On the Slide tab, select the Date and time check box, and then choose the kind of date you want:
- If you want the date and time to reflect the current date and time each time you open or print the presentation, click Update automatically, and then select the date and time format that you want.
- If you want to set the date and time to a specific date, click Fixed, and then, in the Fixed box, type the date that you want.By setting the date on your presentation so that it is Fixed, you can easily keep track of the last time you made changes to it.
- If you want to add the date and time to all of the slides in your presentation, click Apply to All.
Add text to the footer
- On the Insert tab, select Footer.
- On the Slide Footer dialog box, check the Footer box.
- In the box below Footer, type the text that you want, such “Company Confidential”.
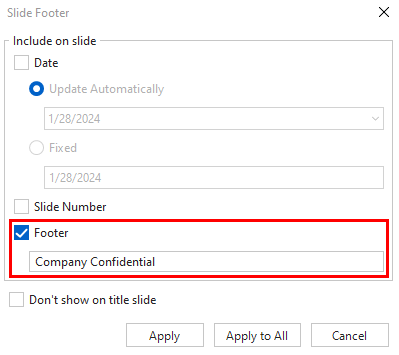
- To prevent the footer from appearing on the title slide, check the Don’t show on title slide box.
- Select Apply to All to make the footer appear on all slides, or select Apply to make it appear on just the currently selected slide.