Use tables to structure text in SmartTutor 360. Tables communicate to screen readers how content is organized and provide context for learners, making tables valuable for accessibility.
In this user guide, you’ll learn everything there is to know about tables in SmartTutor 360.
- Select the slide that you want to add a table to.
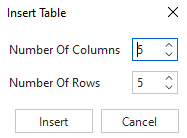
- On the Insert tab, select Table.
- Enter a number in the Number of columns and Number of rows lists.
- To add text to the table cells, click a cell, and then enter your text. After you enter your text, click outside the table.
Tips: |
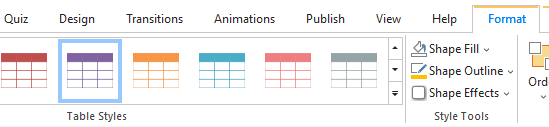
Apply a table style
- Select the table that you want to apply a new or different table style to.
- On the ribbon, select the Format tab to see the Table Styles gallery, as shown below. and then select the table style that you want. To see more table styles, click the More drop-down arrow
on the right of the Table Styles gallery.