In this user guide, you’ll learn how to edit audio videos in SmartTutor 360 with playback speed, Adjust Volume, Remove Green Screen, Blur Video
Changing Video and Audio Speed
Slowing or accelerating audio or video comes in useful if you need to synchronize the tracks or make a video clip more dynamic.
For instance, you can speed up the part of the video which describes a long process of a program installation to the computer or accelerate a clip which explains how to cook an omelette. If the audio narration lasts longer than the video clip, you will be able to slow the video down and therefore extend its length to fit the audio recording.
By default, audio and video speed is equal to 1. You can increase or decrease the recording velocity up to 10 times.
To change audio or video speed:
- Select an audio or video track.
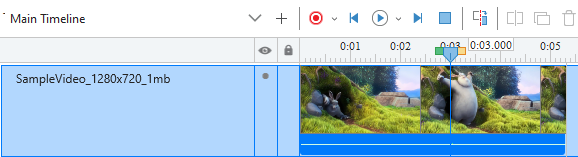
- Then, go to Format tab on the ribbon, click Playback Speed, a Playback Speed window will open
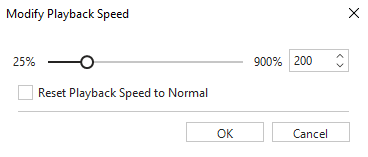
Now, you can speed up or slow down the recording. To do this, you will need to tag the left or the right slider to the corresponding direction. The spin box shows in how many times the recording speed is increased or decreased.
Insert Silence
Basically, the Insert Silence feature works on both audio and video objects. So, take the following steps to insert time:
- Select one or more audio/video objects. Hold CTRL while clicking to select multiple of them.
- Seek the Current Time Indicator along the timeline to the position where you want to pause the track.
- Go to Format tab on the ribbon pane > click the Silence button. This opens the Insert Silence dialog.
You specify the duration of the silence you want to add to the track, then click OK.
Tip: You can use the default value in the Insert Silence dialog (2000 ms) and change the duration later when the silence is added in the Timeline pane.
After that, SmartTutor 360 will add silence to the selected track(s) at the Playhead position. The silence added is represented as the yellow bar.
Remove Green Screen
It’s quite simple to apply the green screen effect to videos in Smart Tutor 360. After inserting your desired video, navigate to the Properties pane > Media tab > Green Screen Effect. Then, do as follows:
- Click the Eyedropper button or click Color Picker and select a color.
- Move the Tolerance slider to adjust the range of color to key out. Higher values key out a wider range of color near the key color
After all the adjustments, if you are not satisfied with the result and want to start all over again, click Reset to revert all the changes.