States let you change the appearance of an object based on a learner’s actions. For example, you might enlarge a button when learners hover over it or add a glow effect when they click it. You can even change character expressions and poses with states.
Most objects in SmartTutor 360 support states, including pictures, shapes, captions, checkbox, radio, dropdown, slider, and buttons.
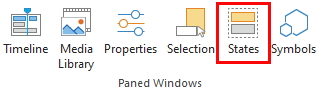
Opening the States Panel
To add new states, manage or edit states. First, you need to open the States pane by one of the following ways:
- Go to the View tab on the ribbon bar > click States:
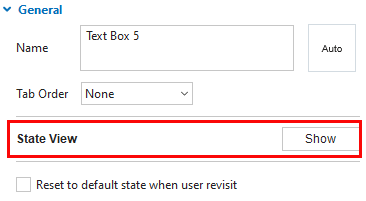
- Select an object, then in the Properties pane > Size & Propertis tab > General section > State View:
Adding States
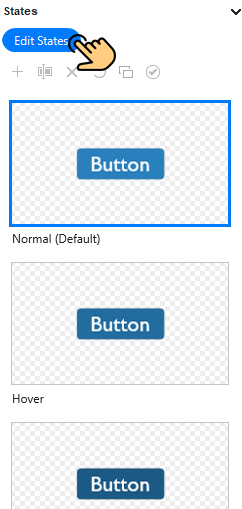
By default, most objects in SmartTutor 360 have one state (buttons have four), but you can add as many as you want.
- Select the object you want to modify, then go to the States panel and click Edit States.
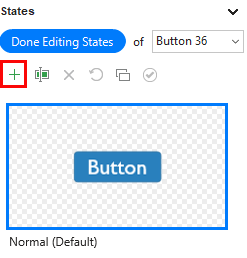
- Click the New State icon (green plus icon) to create an entirely new state, or click the Duplicate State icon (looks like two pieces of paper) to create a copy of the selected state.
- Give the new state a name. You can either choose a built-in state from the drop-down list or enter a different name to create your own custom state.
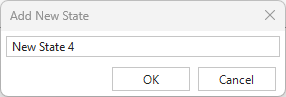
- Click OK to create the new state.
- When you’re finished, click Done Editing States
Editing the Appearance of States
You can change the appearance of any state, including text, shape, color, effects, placement, size, and more. You can even add animations. If you’re editing states for a character, you can also change the expression, pose, and perspective.
- Select the object you want to modify, then go to the States panel and click Edit States.
- Select the state you want to edit (or add a new state as described in the section above), then use the Properties pan or ribbon bar to make your changes. You can add and edit text, add and remove objects, change position, adjust formatting, edit characters, and apply animations.
- When you’re finished, click Done
| Tips: If you need to reset a state to its original appearance while you are editing, click the Reset State icon (looks like a circular arrow). |
Deleting States
- Select the object you want to modify, then go to the States panel and click Edit States.
- Select the state you want to delete and click the Delete State icon or press the Delete key on your keyboard.
- Click Yes to confirm deletion.
- When you’re finished editing, click Done.